
Cutting the base of the bowl
The blank was again mounted, centrally this time, by screwing it on to the backing piece just using the centre hole. Now the blank was mounted on its true centre, there was no need for counterweights.
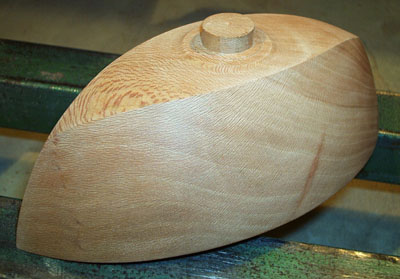
I cut a tenon of a suitable size to mount the piece in the chuck and shaped the bottom of the bowl to a gentle curve (I say bowl because, although it isn’t round, I don’t really know what else to call it!). I find it helps later if a small indent is cut in the centre of the tenon to take the point of the centre – so it can be easily centred when reverse chucking to clean up the base. Once the base and tenon were complete, the blank was removed from the backing and the chuck jaws changed to hold the small tenon I had just cut.
Tenon cut ready for mounting in the chuck.
Hollowing and shaping
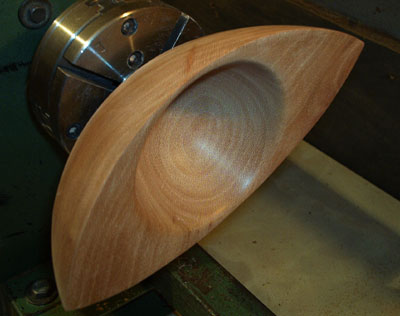
Having switched chuck jaws and remounted the blank – on its own for the first time! It was time to shape the top edge and hollow out the ‘bowl’ part. As the piece was now centred, the speed of the lathe was increased to a better cutting speed without risk of vibration. At this stage, it is still worth bearing in mind that the pointed ends of the bowl are just waiting for stray knuckles once the lathe is running so beware ! Using a deep bowl gouge, I went for a slightly concave curve across the top face instead of leaving it straight. The centre dish was taken to a reasonable depth and width, leaving a wall thickness I was happy with although you could say it was between a few millimetres and a couple of inches, depending on which way you look at the bowl!
Bowl after hollowing and shaping the top.
The inside of the bowl was sanded with the lathe running and the top was sanded with the lathe stationary. it was then given a couple of coats of danish oil. I prefer the oil to sanding sealer as a base coat and often use it as the only finish but in this instance I was going to top it with a final coat of wax polish.
Finishing the foot
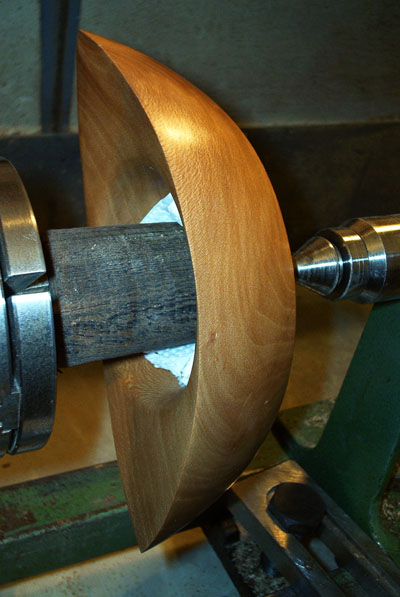
Using a piece of scrap wood, I turned a suitably shaped stub which could be mounted in the chuck and used to support the inside of the bowl while the tailstock was brought in to hold the bowl against it. I placed a piece of kitchen paper between the bowl and the stub to protect the surface of the bowl and to provide better contact for driving the bowl by friction only.
Reverse mounting.

The toolrest was positioned and again checked not to be in the way of the bowl when it was rotated and now all that was left to do was to turn away the tenon and to shape the base. I turned the tenon down to what I thought was the minimum I could safely work with while shaping the foot and cut the foot. Once I was happy with the shape of the foot, I turned away the remains of the tenon as far as I dared! finishing off the small stub by hand after removing from the lathe. The base and the foot were sanded and once completed, the base was coated in danish oil as for the rest of the bowl and once this had dried, I applied a final finish of wax. Due to the shape of the bowl most of the buffing had to be done by hand (unfortunately!).
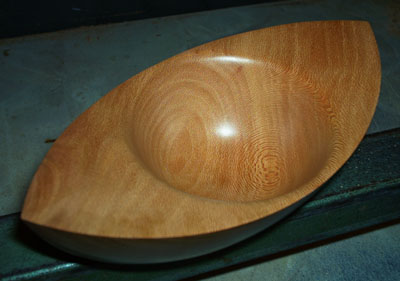
The Finished Bowl

Underside
Inside
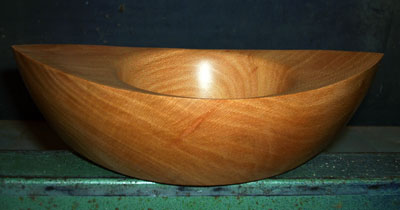
Side
Next – Triarc bowl
Back to Cutting the second curve