
Sanding
Use dust extraction and breathing apparatus when sanding.
Start with a grit coarse enough to remove any remaining ridges and imperfections. Around 120 or 150 grit is usually a good start but if you need to use 80 grit, use it rather than persisting with a grit that is too fine to do what is required. Work through progressively finer grits (180, 240, 320, 400 etc.) until the required finish is obtained.
Do not use too much pressure while sanding, this just generates more heat.
Only move to the next grit when all the marks from the previous stage have been removed and if you find you have overlooked some torn grain or sanding marks, go back to the appropriate grit and continue from there.
Once sanding is complete, the outside of the bowl can be completed with the finish of your choice.
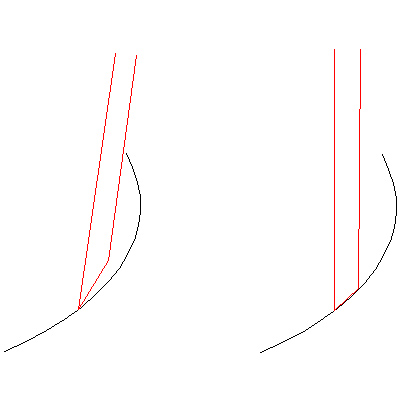
Tool angles
For shallow bowls, a bevel angle of 45 to 50 degrees is usually adequate. I tend to use 48 degrees. For deeper bowls or ones with turned over rims, a steeper bevel angle of 60 degrees or more might be necessary so the tool maintains bevel contact throughout the cut and doesn’t foul on the bowl rim.
The diagram below illustrates the principle. The shallower bevel on the left is unable to maintain contact because the tool shaft is restricted by the rim of the bowl. The steeper bevel on the right avoids this problem.
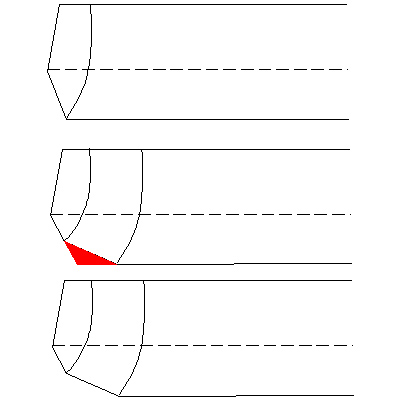
To reduce the occurrence of ridges throughout the curve, grind back the heel of the bevel, or even grind multiple bevels. This allows the gouge to follow the curve you are trying to cut more closely without forming ridges.
The three images are – Initial grind, area to remove shown in red (by grinding a second bevel at a shallower angle) and final appearance of the gouge.
Next – Hollowing the bowl
Back to Mounting the bowl