
Cutting the first arc on the lathe
Now the assembly was screwed together and balanced, the next stage was to put it on the lathe and set to work on shaping it. My lathe is one of the step pulley speed adjustment rather than the variable speed type so I set it to the lowest available speed before starting. Once the assembly was mounted on the chuck (and after a final check that all the screws were tight!) I started the lathe while standing well clear of the firing line just in case something should come adrift but it seemed very well balanced and free from vibrations, closer than a lot of the roughly hewn logs that end up on there anyway! So having stopped the lathe, I set up the toolrest and manually rotated the work to ensure nothing was going to catch when I restarted the lathe. It is important to bear in mind that the rotating object is something like a propeller and it is essential to treat it with respect. Beware of the edge of the rotating mass, especially because it is not easy to see where the edge is.
Initial cuts were made very lightly, using a roughing gouge, with a good balanced stance so the tool could be held firmly while cutting what is mostly air ! Once the cut was more consistent, I switched to a half-inch gouge and continued to form the curve. I was aiming for a fairly gentle curve inwards from the top edge to the base in order to leave enough flat area underneath for a foot. While cutting the curve I also trimmed the edge of the pine backing piece at the same time so it was the same level as the edge of the bowl. This meant that when the second curve was cut, the edge of the backing piece could be used as a reference for height. I re-sharpened the gouge more frequently than I would usually do (maybe I should re-sharpen more often anyway!) to get as clean a cut as possible so the edges of the arc were as clean as possible. A blunt tool or heavy handed cuts can leave a ragged, chipped edge. Another point to bear in mind is that as for much of each revolution, the end of the tool is floating in free air, it is important to hold it at the correct attitude so once the wood is in contact, the correct cutting angle is attained.
I noticed as I neared completion of the first side that the vibrations were becoming more pronounced as I removed wood from the blank. I was close to finishing and the vibrations weren’t too great so I decided to carry on and finish but if while you are undertaking a similar project, stop and rebalance by moving the counterweight inwards if it becomes excessively out of balance.
Once I had cut a profile I was happy with, I set about sanding it. Initially, I used a cork block and made use of the toolrest to steady my hand while holding it but I found it was easier just to sand by hand with the lathe stopped. Once all traces of tool marks were gone, I worked down the grits as far as 400 grit but the level of sanding would depend on what wood you were using and the finish you are trying to achieve. Once the sanding was completed, I made a cardboard template to match the profile of the top to bottom curve I had just shaped so it could be used as a check for the second side when it was cut.
First side cut and sanded

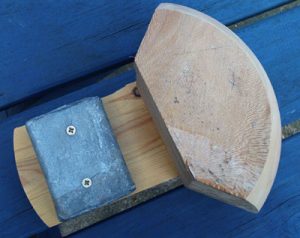
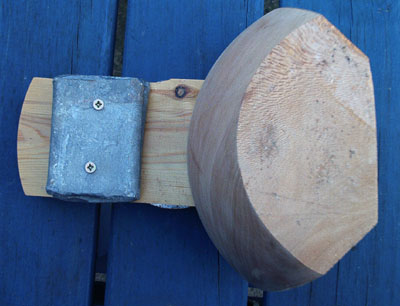
Showing the chuck side
Once the first side had been cut, the blank was reversed on the backing piece by removing the outer screws and loosening the centre screw, rotating the blank by 180 degrees, replacing the screws and re-tightening. I found as I was getting towards the end of the first side the vibrations were getting stronger as the removal of wood affected the balance so I re-balanced at this stage, which resulted in the lead counterweights moving towards the centre by about another 6mm or so.
Remounted ready for the second side to be cut.
Next – Cutting the second curve
Back to Mounting the blank