
Intro & background
My professional background is in electronics, communications and computer software. I have been a woodturner for over 20 years and have been doing demonstrations for clubs, the occasional trade show and seminars for over 15 years, teaching for around 12 years or so and have been known to write articles here and there too.
I initially decided to set up the capability to do remote demonstrations a couple of years ago. I got as far as buying some webcams but then other projects took precedence. This again came to the fore when the onset of the Covid-19 crisis and lockdown led to demos and tuition becoming casualties of the clubs shutting down and social distancing.
It was at that point many people realised that they needed a way to bridge the chasm between those offering demonstrations and tuition and their consumers. Internet video conferencing technology has been available in various guises for almost 30 years but was probably held back by expensive hardware, slow broadband and low bandwidth mobile communications. Recent years have seen quantum leaps both in broadband, mobile networks and computer peripherals so the union between carrier and broadcaster has become commonplace.
Principles and basics of the technology
The technology employed is to use two computer platforms connected to a central server via a common network (the internet). Each computer can have devices attached to provide video and audio signals, which are compressed and sent to the server for forwarding to the recipient(s). Each connected party can use their own connected devices so each party in the session each has access to audio and video from each of the others. Depending on the system in use, it is possible to connect anything from a handful to several hundred “interactive” parties in a single session and even higher numbers in a broadcast only mode.
The “interactive” element makes the technology attractive because the participants can talk or write directly to the broadcaster and others in real time, emulating the live demonstration or workshop while avoiding the travelling.
The ability to reach consumers without leaving their workshop is an attractive proposition to many turners who may spend more hours travelling than actually demonstrating. It also has the advantage of allowing the demonstrator to have their entire workshop at their fingertips rather than just what they were able to pack and transport.
Clubs and individuals now have access to turners who previously were out of their range, both geographically and financially. They also stand to save money on the demonstration costs because no travel or subsistence is involved. However, both then demonstrator and receiver(s) now have other equipment and communication costs but in the long term, these are perceived to be less than the previous travel costs. Clubs may also benefit by being able to pool resources with other clubs to save costs and also by having the ability to include housebound members who wouldn’t have been able to see the demo by allowing them to view remotely.
Internet connection and Network
Today’s underlying video and audio compression protocols allow this technology to work with speeds in the low Mbit/s range. As an example, Zoom recommends 600 kb/s as the minimum and 1.5Mbit/s as ideal for up to 720p video. These speeds are well within reach with all but the worst rural broadband connections. Where this falls over is in reaching from the comfort of the turner’s home where the wifi is (almost) perfect to the workshop at the end of the garden where the signal fades away! Even workshops attached to the house (like mine) may be through one wall too many to achieve a reliable connection so network extenders or extensions may be necessary. The simplest solution may be a long Ethernet cable (maximum length 100m) from router to workshop but the path between the two may influence the choice.
Other alternatives are wifi repeaters or powerline network adapters that use the domestic power circuit as a transmission medium. These only work reliably if the transmitter and receiver are on the same power circuit.
An alternative to a broadband/wifi connection would be to use a mobile smart phone or MIFI device to create a wifi hotspot connecting via the mobile network. If a mobile network connection is used, 3G or above should provide adequate bandwidth but 4/5G would be better. This option would only be workable if you were in a location with a reliable signal strength from a mobile network.
Computers
These days, computers come in many forms including desktop and laptop (with one of Windows, MacOS or Linux operating systems), tablets, phones and even TVs. Any of these devices which has the capability of running the application provided by the chosen broadcast system can be used as the base for operations. Phones, tablets and TVs may not have the facility for connecting all the external devices you plan to use but it is possible instead of connecting multiple cameras to a single computer to use separate computers in the form of phones and tablets as independent camera platforms by logging each one in to the server. This adds a layer of complexity to the broadcast software operation but isn’t too difficult to manage.
The more cameras you connect, the more processing power you will need so don’t expect that 10 year old PC to cope! However, as the camera resolutions may be higher than the maximum broadcast resolution, it may be advantageous to configure your software to reduce the effective resolution of the cameras to reduce the processing power needed and the size of any video files recorded.
Each platform has its own minimum specifications for host devices so it would be worth checking what your chosen platform would need.
Broadcast Systems
There are many systems out there to enable two way video conferencing and group meetings including Skype, Webex, Zoom, ClickMeeting, BlueJeans, RingCentral and many others. Just search for video conferencing on the web to find many more.
Each system has its own pros and cons. My recent experience is limited to Skype, Webex and Zoom. I used to like Skype but since Microsoft took it over, it has been stripped of many of its useful features and now exists as two variants, the one that comes with Microsoft Office and the one available as a free download. Either would work for small groups but I wouldn’t like to try to manage a large group with either version. Webex by Cisco only allowed up to three participants in the free version and a basic subscription price was out of range for many but they have now increased the free account to 100 participants and unlimited meeting length. In practice I have witnessed several Webex meetings which were disrupted by various technical issues preventing people from joining the meeting. Less than ideal if the participants are paying guests! Out of the three, Zoom appears to be leading in popularity and ease of use and is competitively priced for the demonstrator so we will concentrate on that one. However, I think recent events have made the players in this market consider their packages and price structure and competition is definitely moving up a gear so look at the options before committing your cash.
Video pre-processing Software
If you wish to use a single webcam or even multiple independent devices with one camera each, you don’t need to worry about this part. You only really need video pre-processing software if you intend to use multiple cameras connected to a single computer or make use of other inputs such as images and pre-recorded video. The pre-processing software is used to configure each camera, preset zoom settings for different scenes, adjust for colour temperature and lighting conditions, set up advanced scenes with picture in picture, enable other inputs from still images, slide shows, videos etc.
Your choice of pre-processing software may be dictated by your computer operating system.
VMix is only available on PC/Windows. The free version allows up to two webcams at a low resolution. The basic licence allows up to four webcams at up to 1080p. VMix also supports NDI (Network Device Interface) for sending video over the network instead of via USB. VMix minimum processor requirement is at least a 2GHz dual core i5 processor but they recommend at least a 3Ghz quad core i7.
OBS (Open Broadcaster Software) as the name implies, is free and open source. This means the software has no limitations based on tiered subscription. It supports multiple webcams and NDI with the appropriate plugin. OBS is available for Windows, Mac and Linux. Processor requirements are at least 2Ghz dual core i5 processor.
There are other software packages available, some with considerable price tags so choose carefully!
Both OBS and VMix allow more than just webcam inputs. You can configure slide shows from images, inputs from recorded video and audio, web pages, application windows, desktops etc. which should provide for most eventualities.
I have tried both VMix basic and OBS. With the same webcam inputs, VMix used more processing power on my computer and was more complicated to use so I decided to go with OBS.
Cameras
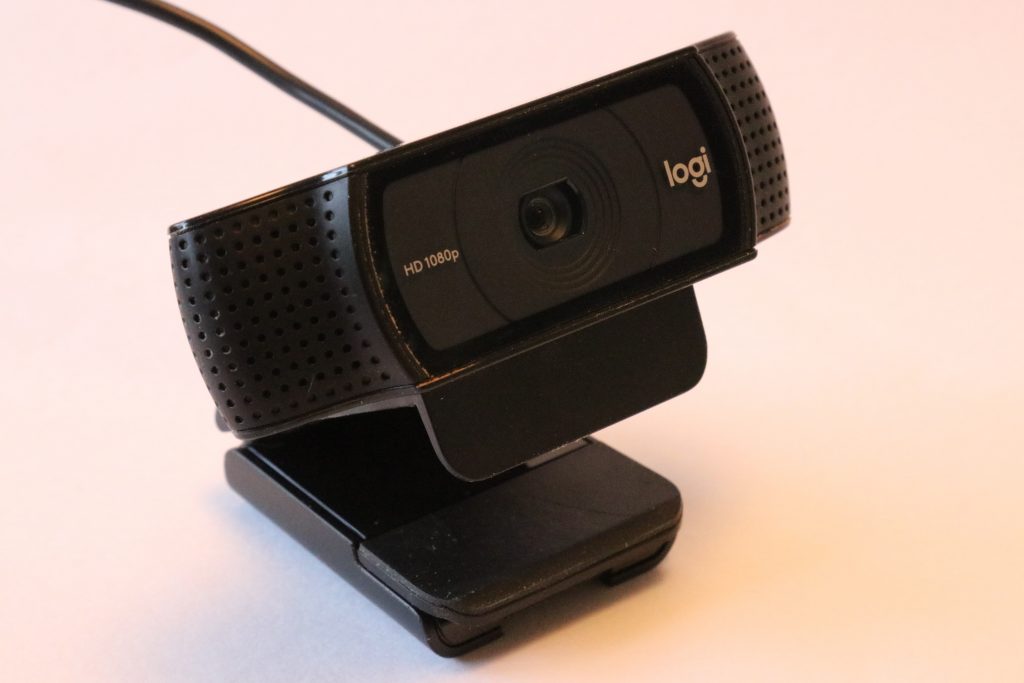
The basic input method is a USB webcam. Ideally a resolution of 720p or 1080p is preferable. The webcam shown in the photo is a Logitech C920 which has a 1080pixel sensor. These currently cost around £70 if you can find anywhere with them in stock! Since the Covid-19 lockdown, everyone has been buying webcams to communicate with the rest of the world so webcams are a scarce commodity at the moment but that will no doubt change.
Zoom in its basic configuration just broadcasts at 720p or less (it adjusts for available bandwidth) so higher resolution cameras may be unnecessary. However, Zoom can be configured to broadcast at 1080p but greater bandwidth is needed to do so and generally speaking, 720p provides more than acceptable viewing quality. In an ideal world, it would be best to have each USB camera input on a separate USB bridge but unless you are building a custom PC, that option may not be available, in which case use USB3.0 in preference to USB2.0 if both are available and use the higher resolution cameras on the faster ports.
If you have other types of cameras, you may be able to use those too. Some may have a USB port which can be connected to the PC in conjunction with some additional driver software so it appears as another webcam.
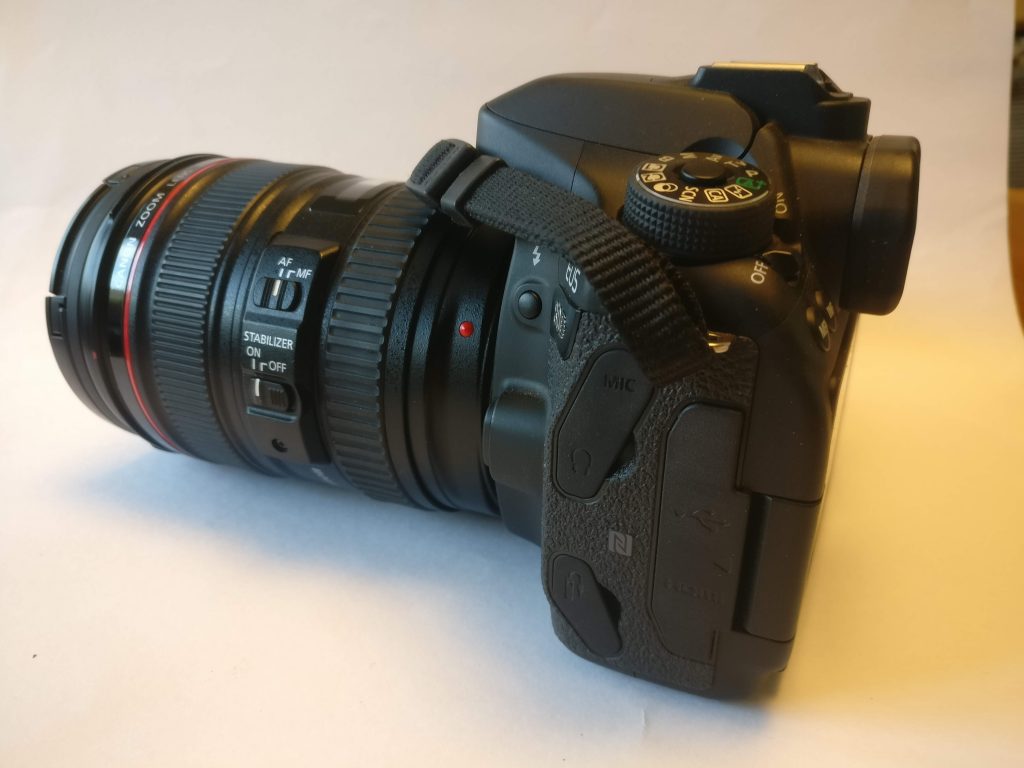
Canon just released software to enable their range of DSLRs to be used as webcams via USB. Other manufacturers may have already followed suit so it’s worth checking. A DSLR may be total overkill in terms of resolution but they have the advantage of greater control over the image and a choice of lens / zoom to get the best capture possible. Other alternative are to use a HDMI or composite video to USB converter for cameras with HDMI / composite output or to use NDI devices (smartphone, tablet etc. connected over your local network).
Audio
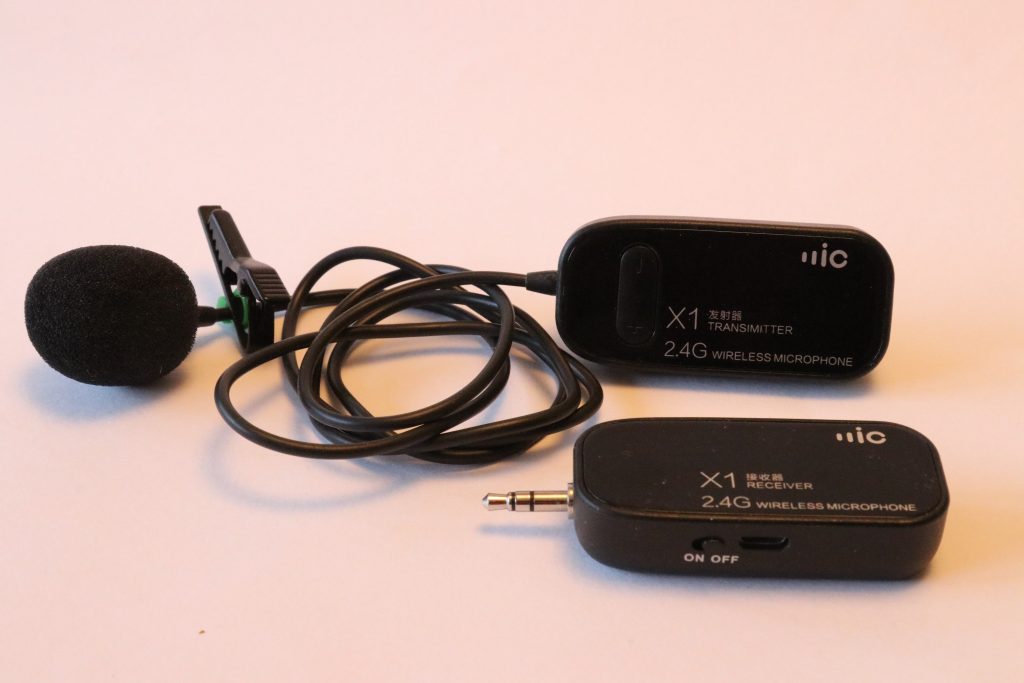
Good quality audio is essential for any demonstration. Otherwise the audience just isn’t going to stick around. As you will be moving around possibly some way from the computer, wireless microphone would probably be the best solution.
This keeps the microphone close to your mouth so the sound of your machinery is just background noise rather than dominating. Given that any wireless device is going to either be battery powered or rechargeable, it would be advisable to have a backup either in the form of spare batteries or a second microphone. Either a clip on lapel microphone or one with a headset would be best for a demonstration.
Creating your “Studio”
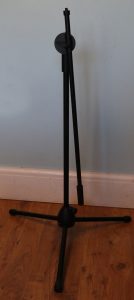
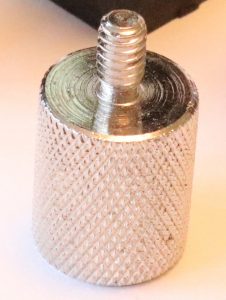
Having obtained all the essential equipment, you will need some way of arranging and mounting it all to make it easy to use during your demonstration. The last thing you want to be doing is to have to move a long way from your lathe to check on proceedings on the computer so a laptop stand that could be sited conveniently would be a good idea. All the cameras need to be mounted securely and in positions to capture the action. Microphone stands with adjustable booms make good camera mounts for lightweight webcams. They may need an adapter (shown below) to convert the microphone screw to the camera tripod screw but these are easily obtained. Some microphone stands also come with one or two clips for holding a microphone that may be useful if you have cameras without a tripod screw.
Camera tripods can be used but generally, the camera has to be directly above the footprint of the tripod which means it may be farther away from the action. You can get booms for camera tripods but they often cost more than a complete microphone stand. If the camera is a long way from the centre of gravity of either a microphone stand or tripod, you may need to counterbalance the stand to stop it tipping over.
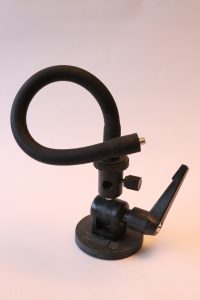
Magnetic camera mounts with flexible arms are also handy as long as your lathe doesn’t vibrate to the point where it would affect the image from any camera attached to it.
You can make your own camera supports from wooden battens, poles or anything you can fix securely and mount a camera.
Once you have figured out the location of computer, cameras and network connection, you will need to add power and network cables so you have power and comms to your computer (don’t just rely on battery power – if it’s running several cameras the battery drains much faster). You will probably need USB extensions too so you can position the cameras where needed.
Lighting
Even the best camera in the world will still produce flat and grainy images if the lighting isn’t up to scratch. Most digital cameras struggle with wide differences in levels of illumination across a scene so to ensure parts of the image aren’t burnt out, avoid spotlighting the areas of interest and set up lighting to give good, bright illumination across the whole scene. If that isn’t possible, position the cameras to avoid dark areas of background which may influence the overall scene exposure. Almost any type of lighting can be used but bear in mind that fluorescent tubes may cause flicker on the video output but this may be reduced by ensuring your webcams are configured to the correct mains frequency to reduce flicker and sometimes changing the frame rate from 30 to 25 might also make a difference to flicker with minimal effect on the output stream. LED lights in the form of bulbs for lamps, strip lights and panels are available with high intensity for relatively low power consumption so those are probably the way to go if the budget allows. Portable LED studio lights are also available if you have any floor space left for yet more tripods!
Extra accessories
¼ UNC bolts & nuts
Camera tripod screws are threaded ¼ UNC so bolts and nuts with this thread can be used to make custom mounts or modify existing ones.
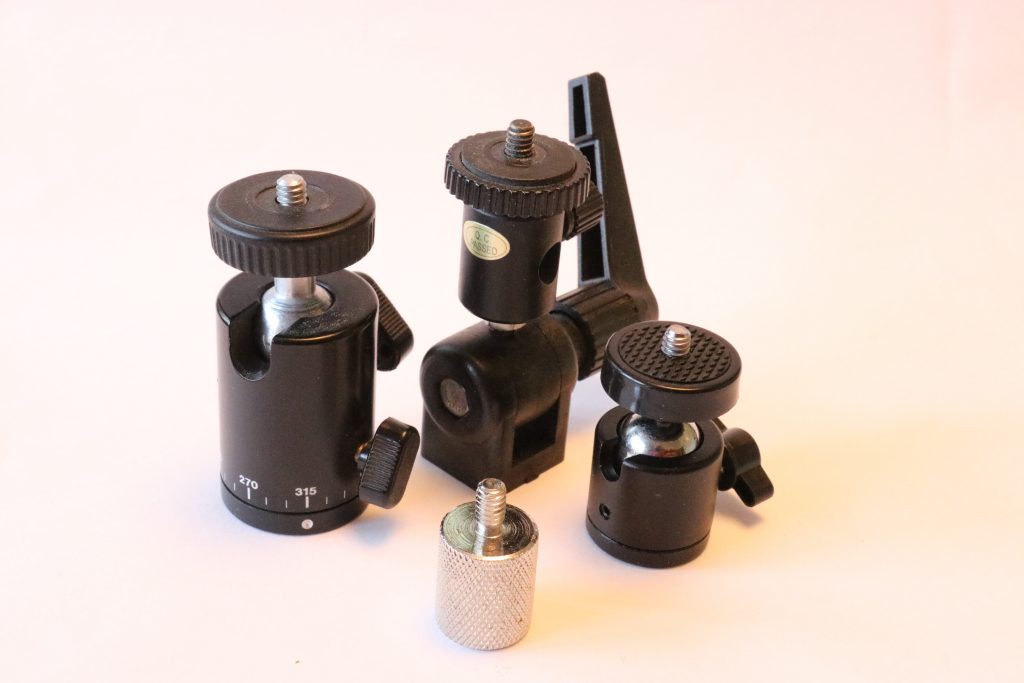
Tripod gimbals
Sometimes you want to be able to rotate the camera on the end of the tripod or boom. Gimbals allow rotation in one or more planes so you can position the camera exactly where you want it. They cost very little so it pays to have a few!
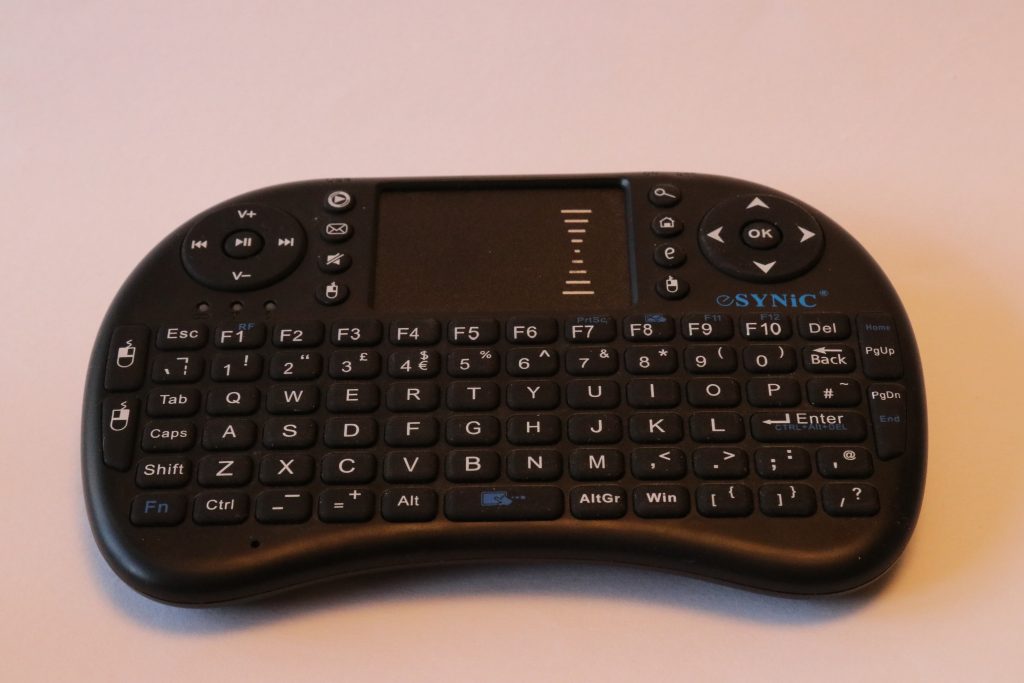
Wireless keyboard
You can set up keyboard shortcuts so when you press a key the view switches to any of your preset scenes. Having to move from lathe to computer negates some of the benefit of shortcuts so a small wireless keyboard attached to the lathe allows use of the keyboard controls where the action is happening.
Rare earth magnets
Small powerful magnets can be used to attach things such as the wireless keyboard above to your lathe. I stuck three of these magnets to my wireless keyboard so I can attach it anywhere I want on my lathe.
Cable ties
Useful for cable management and fixing that broken microphone clip!
Putting it all in use
Now you have set up your workshop studio, you are ready to broadcast to the world (or at least some of it!). You can use your new capability for a number of scenarios.
Testing
Find a friend or two and set up a session using all your equipment. Use Zoom’s settings to check your transmission rates and resolution and tweak the software as required to achieve stability and quality. Once you are happy, set up a demo for a small group, record it so you are able to play it back and analyse and ask the participants to feed back too. I changed my setup based on findings from my first couple of sessions and the suggestions and feedback resulting from them.
Point to Point Broadcasts
A broadcast to a single recipient could be used to do an interactive remote demonstration to a club. They would need a computer and viewing facilities such as monitors or projectors and screens and an audio facility to allow them to communicate with you easily.
A second use for point to point broadcasts would be either for small group workshops or one to one tuition. Remote teaching of this type may never fully replace hands on but it can be a useful tool to extend your reach as a tutor.
Broadcasting to multiple recipients.
Some club demonstrations may be to multiple recipients rather than just to the club meeting place. Or you may be doing an independent demonstration where you are inviting a number of viewers, paid or otherwise. These would entail distribution of the meeting connection details to all recipients. In the case of a “pay per view” demonstration, distribution of the meeting details would need to be limited just to those who have paid for the service but you may choose to publish details of a free event for all to see.
Security
There have been questions raised about the way internet services such as these meeting platforms, social media channels etc. handle people’s information. There is no such thing as a totally secure system. It is necessary to fix any vulnerability as they are identified to prevent exploitations by undesirable parties. That’s why you see regular updates to your software. Recording sessions with video of participants should be approached with caution. If you intend to upload recordings for later viewing, you either need to obtain consent from those in the recordings or edit them out of the footage. Depending how you do your recording this may be easy or difficult – something else to bear in mind when staging live video sessions.
Useful links
Zoom video conferencing: zoom.us
Webex video conferencing: www.webex.com
Adobe premiere video editor: www.adobe.com
Lucid Woodurners – group of turners sharing information on use of technology: www.lucidwoodturners.com